
Issue #789
Using WindowGroup
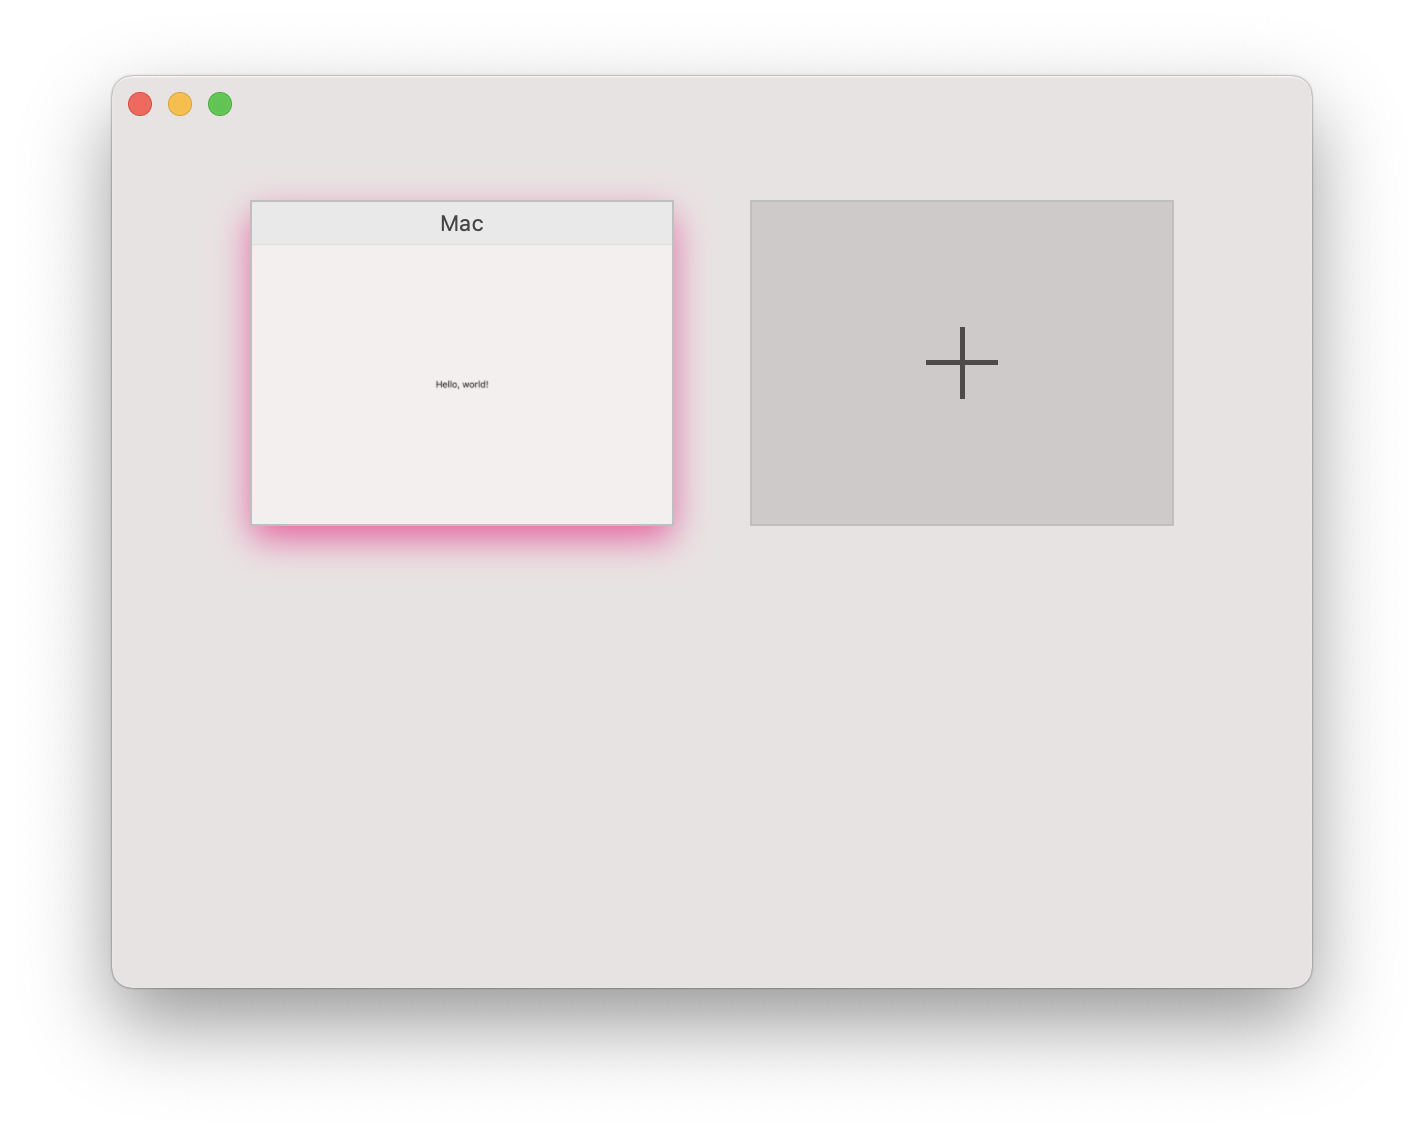
New in SwiftUI 2.0 for iOS 14 and macOS 11.0 is WindwGroup which is used in App protocol. WindowGroup is ideal for document based applications where you can open multiple windows for different content or files. For example if you’re developing a text editor or drawing apps, you can show multiple windows for different text file or drawing. All is handled automatically for you if you use WindowGroup
An added benefit is you can use Settings and commands to add Preferences panel and menu at easy. These only works when you use WindowGroup
@main
struct MacApp: App {
    var body: some Scene {
        WindowGroup {
            ContentView()
        }
        .commands {
            CommandMenu("Custom Menu") {
                Button("Say Hello") {
                    print("Hello onmyway133")
                }
                .keyboardShortcut("h")
            }
        }

        Settings {
            VStack {
                Text("My Settingsview")
            }
        }
    }
}
You have these menu for free
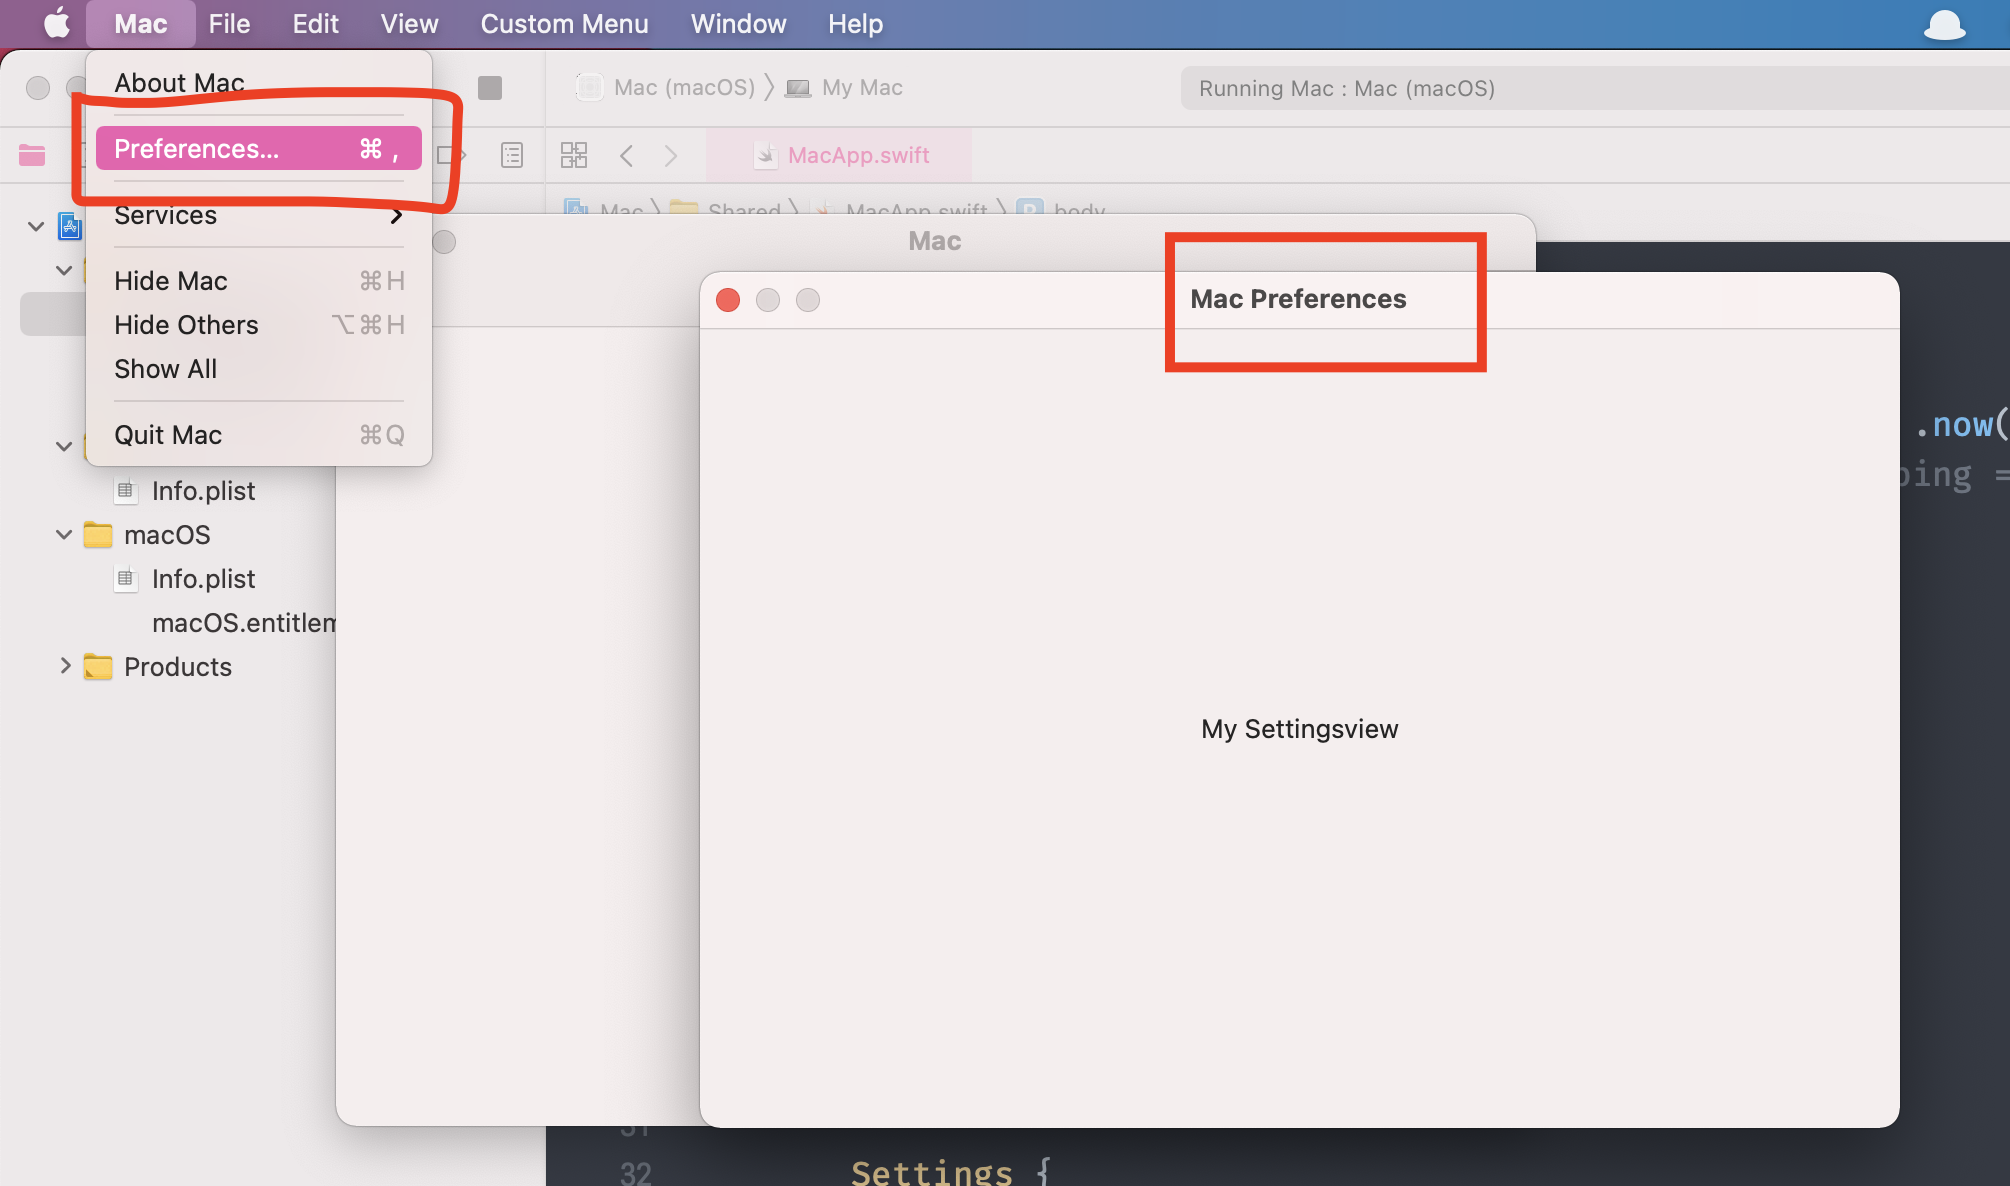
- Mac -> Preferences to show preferences panel with default Cmd+command shortcut
- File -> New Window to open new Window
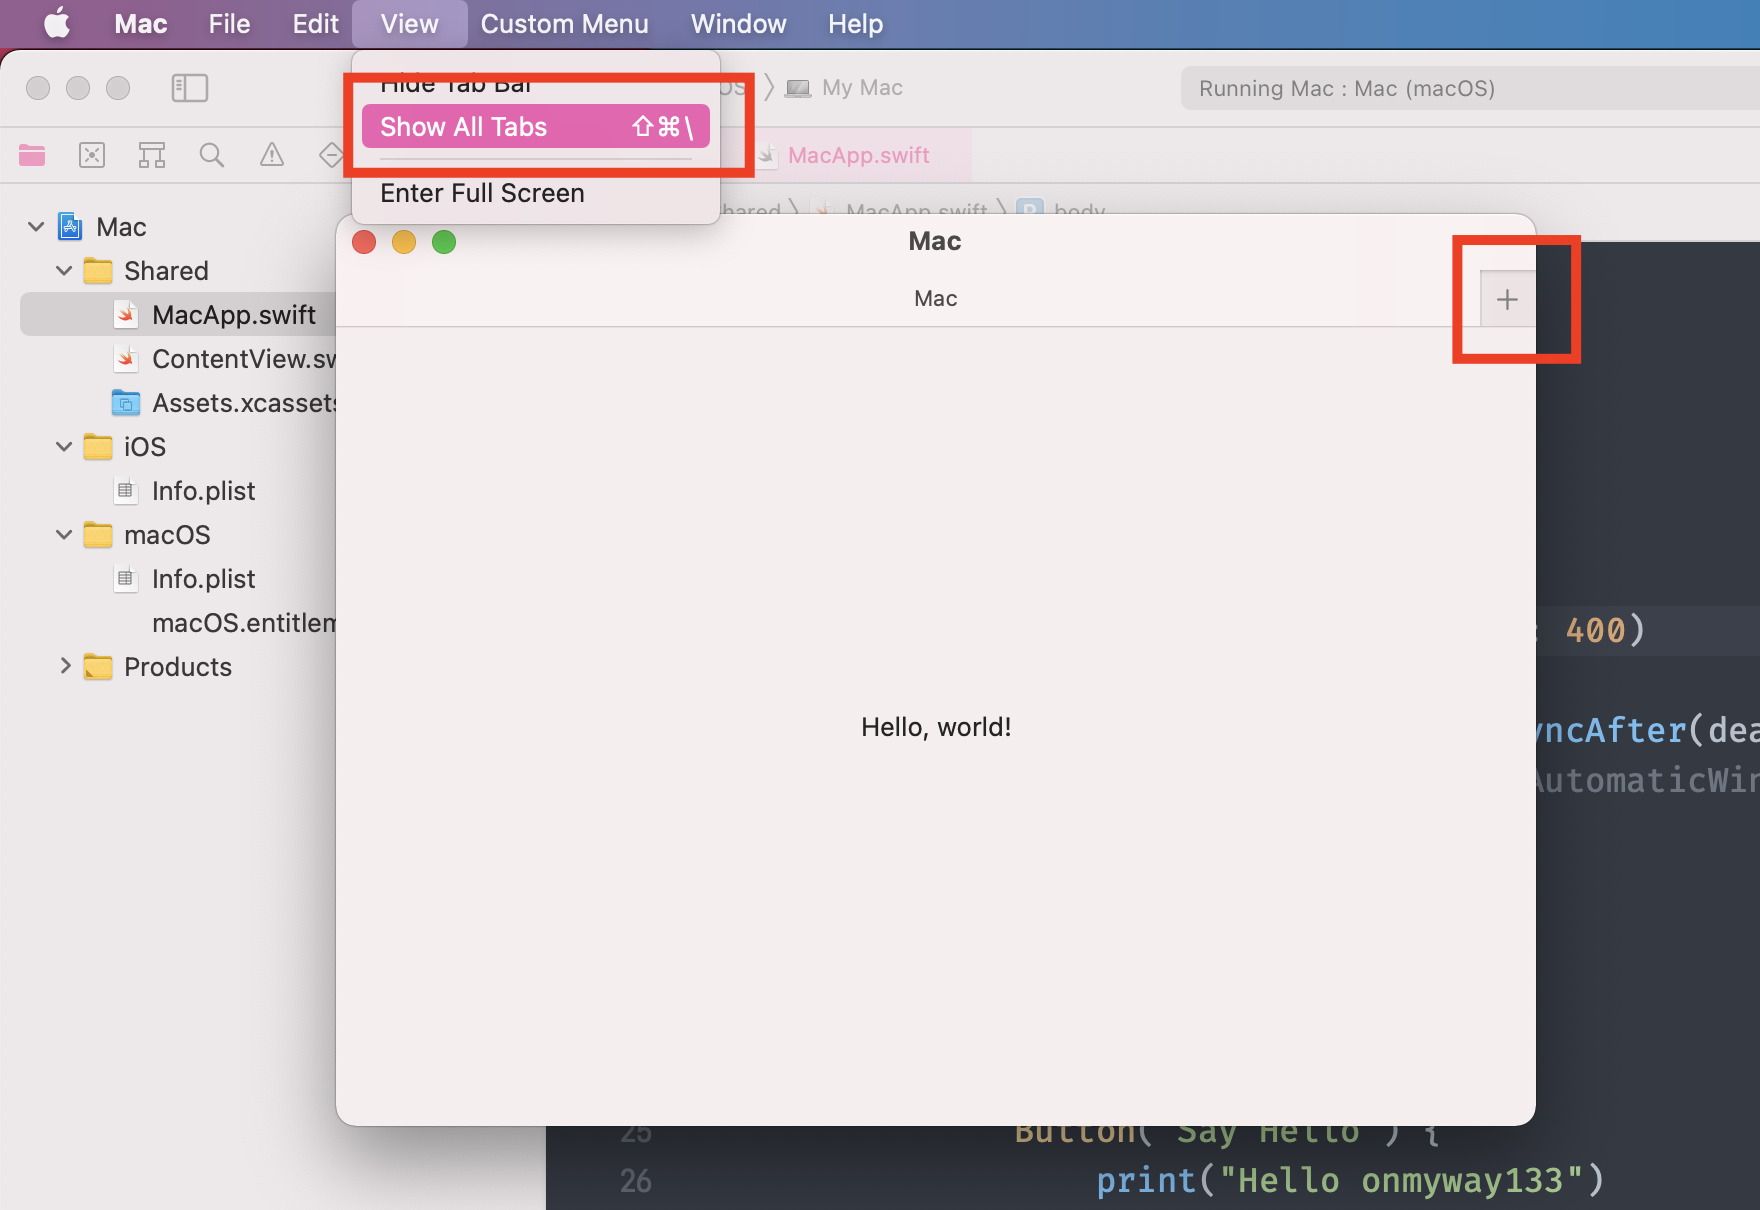
- View -> Show Tab Bar to show tab bar with add button to open and manage tabs
External events
Another modifier that works exclusively for WindowGroup is handlesExternalEvents
Specifies a modifier to indicate if this Scene can be used when creating a new Scene for the received External Event. This modifier is only supported for WindowGroup Scene types.
Here you can declare another WindowGroup to handle external events separately
@main
struct MacApp: App {
    var body: some Scene {
        WindowGroup {
            MainView()
        }

        WindowGroup {
            HelperView()
        }
        .handlesExternalEvents(matching: Set(arrayLiteral: eventValues))
    }
}
Customize WindowGroup
WindowGroup is very convenient, but you may find it tricky to customize its behavior
Single window mode
To avoid user opening multiple windows at once, we can replace the default New Window and its keyboard shortcut altogether by using CommandGroup with replacing
@main
struct SingleWindowApp: App {
    var body: some Scene {
        WindowGroup {
            ContentView()
        }.commands {
            CommandGroup(replacing: .newItem, addition: { })
        }
    }
}
Access underlying NSWindow
A common trick is to use an NSViewRepresentable to get underlying view.window and attach this to our SwiftUI view
struct WindowAccessor: NSViewRepresentable {
    @Binding var window: NSWindow?

    func makeNSView(context: Context) -> NSView {
        let view = NSView()
        DispatchQueue.main.async {
            self.window = view.window
        }
        return view
    }

    func updateNSView(_ nsView: NSView, context: Context) {}
}
@main
struct MacApp: App {
    @State
    private var window: NSWindow?

    var body: some Scene {
        WindowGroup {
            ContentView()
        }
        .background(WindowAccessor(window: $window))
}
Disable tab
To disable tabbin, we can declare NSApplicationDelegateAdaptor to use our old NSApplicationDelegate again. When the app launches, set NSWindow.allowsAutomaticWindowTabbing to false to avoid
import AppKit
import SwiftUI

final class AppDelegate: NSObject, NSApplicationDelegate {
    func applicationDidFinishLaunching(_ notification: Notification) {
        NSWindow.allowsAutomaticWindowTabbing = false
    }
}

@main
struct MacApp: App {
    @NSApplicationDelegateAdaptor(AppDelegate.self)
    var appDelegate
}
Make window resizable
Instead of specifying width and height, use minWidth and minHeight to make window resizable
@main
struct AlmightyApp: SwiftUI.App {
    var body: some Scene {
        WindowGroup {
            MainView(store: Store.shared)
                .frame(minWidth: 800, minHeight: 600)
        }
    }
}
Search field on a toolbar
SwiftUI makes it easy to declare toolbar and items. While there is less options for placement on Mac than there is in iOS or Catalyst, the .navigation placement works OK
import SwiftUI
import EasySwiftUI
import Omnia

struct MainView: View {
    var body: some View {
        NavigationView {
            list
                .navigationTitle("Almighty")
                .toolbar {
                    ToolbarItem(placement: .navigation) {
                        Button(action: onToggleSidebar) {
                            Image(systemName: SFSymbol.sidebarLeft.rawValue)
                        }
                    }
                }
            content
            .toolbar {
                SearchField(text: $searchText)
                    .frame(width: 200)
            }
        }
    }
}
Here I use a simple NSSearchField to have the look and field of a native AppKit search field. This looks better than the plain SwiftUI TextField.
struct SearchField : NSViewRepresentable {
    @Binding
    var text: String

    func makeNSView(context: Context) -> NSSearchField {
        let view = NSSearchField()

        return view
    }

    func updateNSView(_ view: NSSearchField, context: Context) {
        view.stringValue = text
    }
}
Show settings programmatically
For now use can select menu MacApp -> Preferences or press Cmd comma to open settings view. In AppKit, the default preferences selector is showPreferencesWindow so you can trigger it like this
NSApp.sendAction(Selector(("showPreferencesWindow:")), to: nil, from: nil)
Use NSWindow for more control
With WindowGroup we gets lots of benefits, but it requires few tweaks to make it work our way, especially for single window scenario.
For a common macOS SwiftUI app with a search bar on the toolbar and a normal settings screen, here’s how I usually do
Setup NSWindow programmatically
Declare NSWindow, set a toolbarStyle and make it makeKeyAndOrderFront
let contentView = ContentView(
    store: stoore
)

let window = MainWindow(
    contentRect: NSRect(x: 0, y: 0, width: 800, height: 600),
    styleMask: [.titled, .closable, .miniaturizable, .resizable],
    backing: .buffered,
    defer: false
)
window.center()
window.setFrameAutosaveName("Almighty.MainWindow")
window.title = "Almighty"
window.toolbarStyle = .unifiedCompact
window.isReleasedWhenClosed = false

toolbar.delegate = self
window.toolbar = toolbar

window.contentView = NSHostingView(rootView: contentView)
window.makeKeyAndOrderFront(nil)
self.window = window
The cool thing is we can specify our own NSWindow subclass to do our own logic. Here is how I check for close and keyDown events. I prefer to do key handling at the window level instead of messing around with first responder between focused views and text fields.
import AppKit
import Omnia

final class MainWindow: NSWindow {
    private let debouncer = Debouncer(delay: 2)

    override func close() {
        orderBack(nil)

        debouncer.run {
            PreferenceManager.shared.save()
        }
    }

    override func keyDown(with event: NSEvent) {
        if !EventService.shared.inspect(event) {
            super.keyDown(with: event)
        }
    }
}
Add search field to toolbar
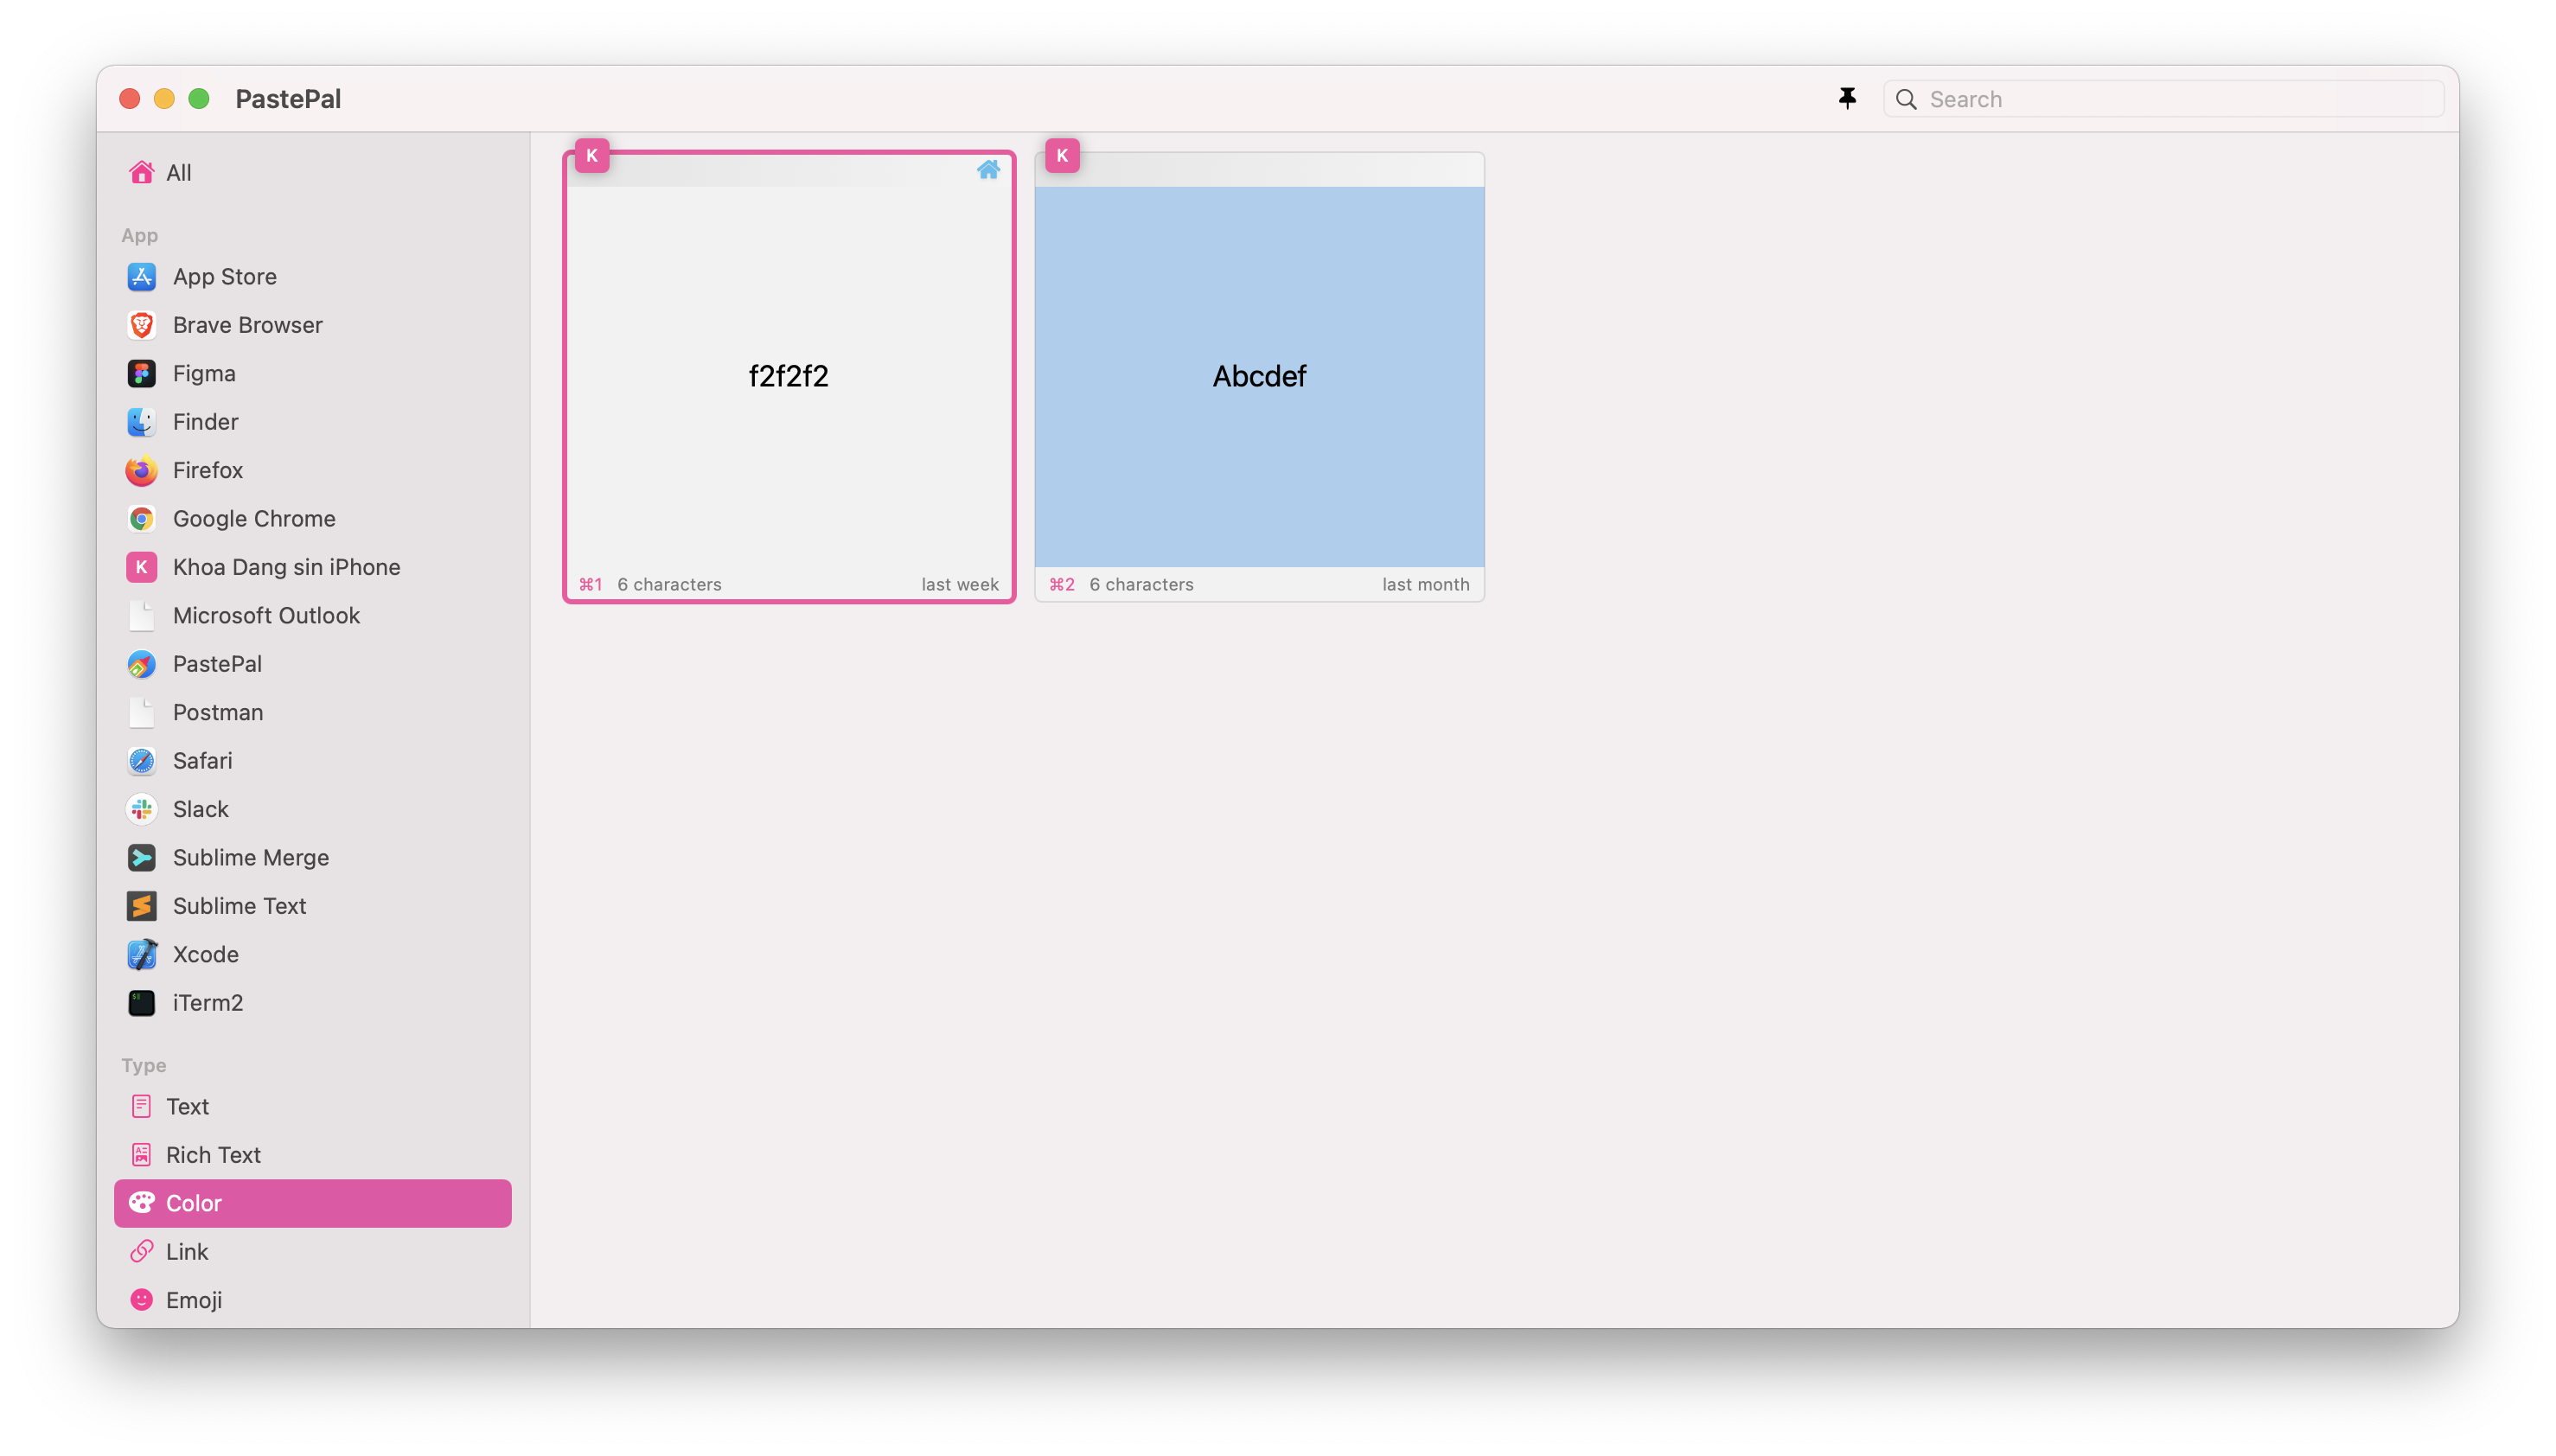
There’s no search bar in SwiftUI for macOS, only TextField. The native macOS search bar has a default magnifying glass icon and a clear button, which will take us some time to replicate it in pure SwiftUI. Or we need to use NSViewRepresentable to wrap NSSearchField
Example is from PastePal
To make tool bar items work, we need to implement NSToolbarDelegate and provides correct NSToolbarItem and specify which identifiers are allowed
extension NSToolbarItem.Identifier {
    static let searchItem: NSToolbarItem.Identifier = NSToolbarItem.Identifier("SearchItem")
}

extension AppDelegate: NSToolbarDelegate {
    func toolbar(
        _ toolbar: NSToolbar,
        itemForItemIdentifier itemIdentifier: NSToolbarItem.Identifier,
        willBeInsertedIntoToolbar flag: Bool
    ) -> NSToolbarItem? {
        switch itemIdentifier {
        case .searchItem:
            searchItem.searchField.delegate = self
            return searchItem
        default:
            return nil
        }
    }

    func toolbarDefaultItemIdentifiers(_ toolbar: NSToolbar) -> [NSToolbarItem.Identifier] {
        [
            .flexibleSpace,
            .searchItem
        ]
    }

    func toolbarAllowedItemIdentifiers(_ toolbar: NSToolbar) -> [NSToolbarItem.Identifier] {
        [
            .flexibleSpace,
            .searchItem
        ]
    }
}
Conclusion
In this article you’ve learned about the new WindowGroup and its benefit. You also learn how to customize it to some extends and how to use the AppKit NSWindow for more fine-grained control. SwiftUI is easy to declare but we have to accept some of its default behaviors, while managing NSWindow ourselves makes customization a breeze. Which you will choose depends on your app requirements.
Start the conversation